A year of building for the terminal
I joined Textualize back in January 2022, and since then have been hard at work with the team on both Rich and Textual. Over the course of the year, I’ve been able to work on a lot of really cool things. In this post, I’ll review a subset of the more interesting and visual stuff I’ve built. If you’re into terminals and command line tooling, you’ll hopefully see at least one thing of interest!
A file manager powered by Textual
I’ve been slowly developing a file manager as a “dogfooding” project for Textual. It takes inspiration from tools such as Ranger and Midnight Commander.
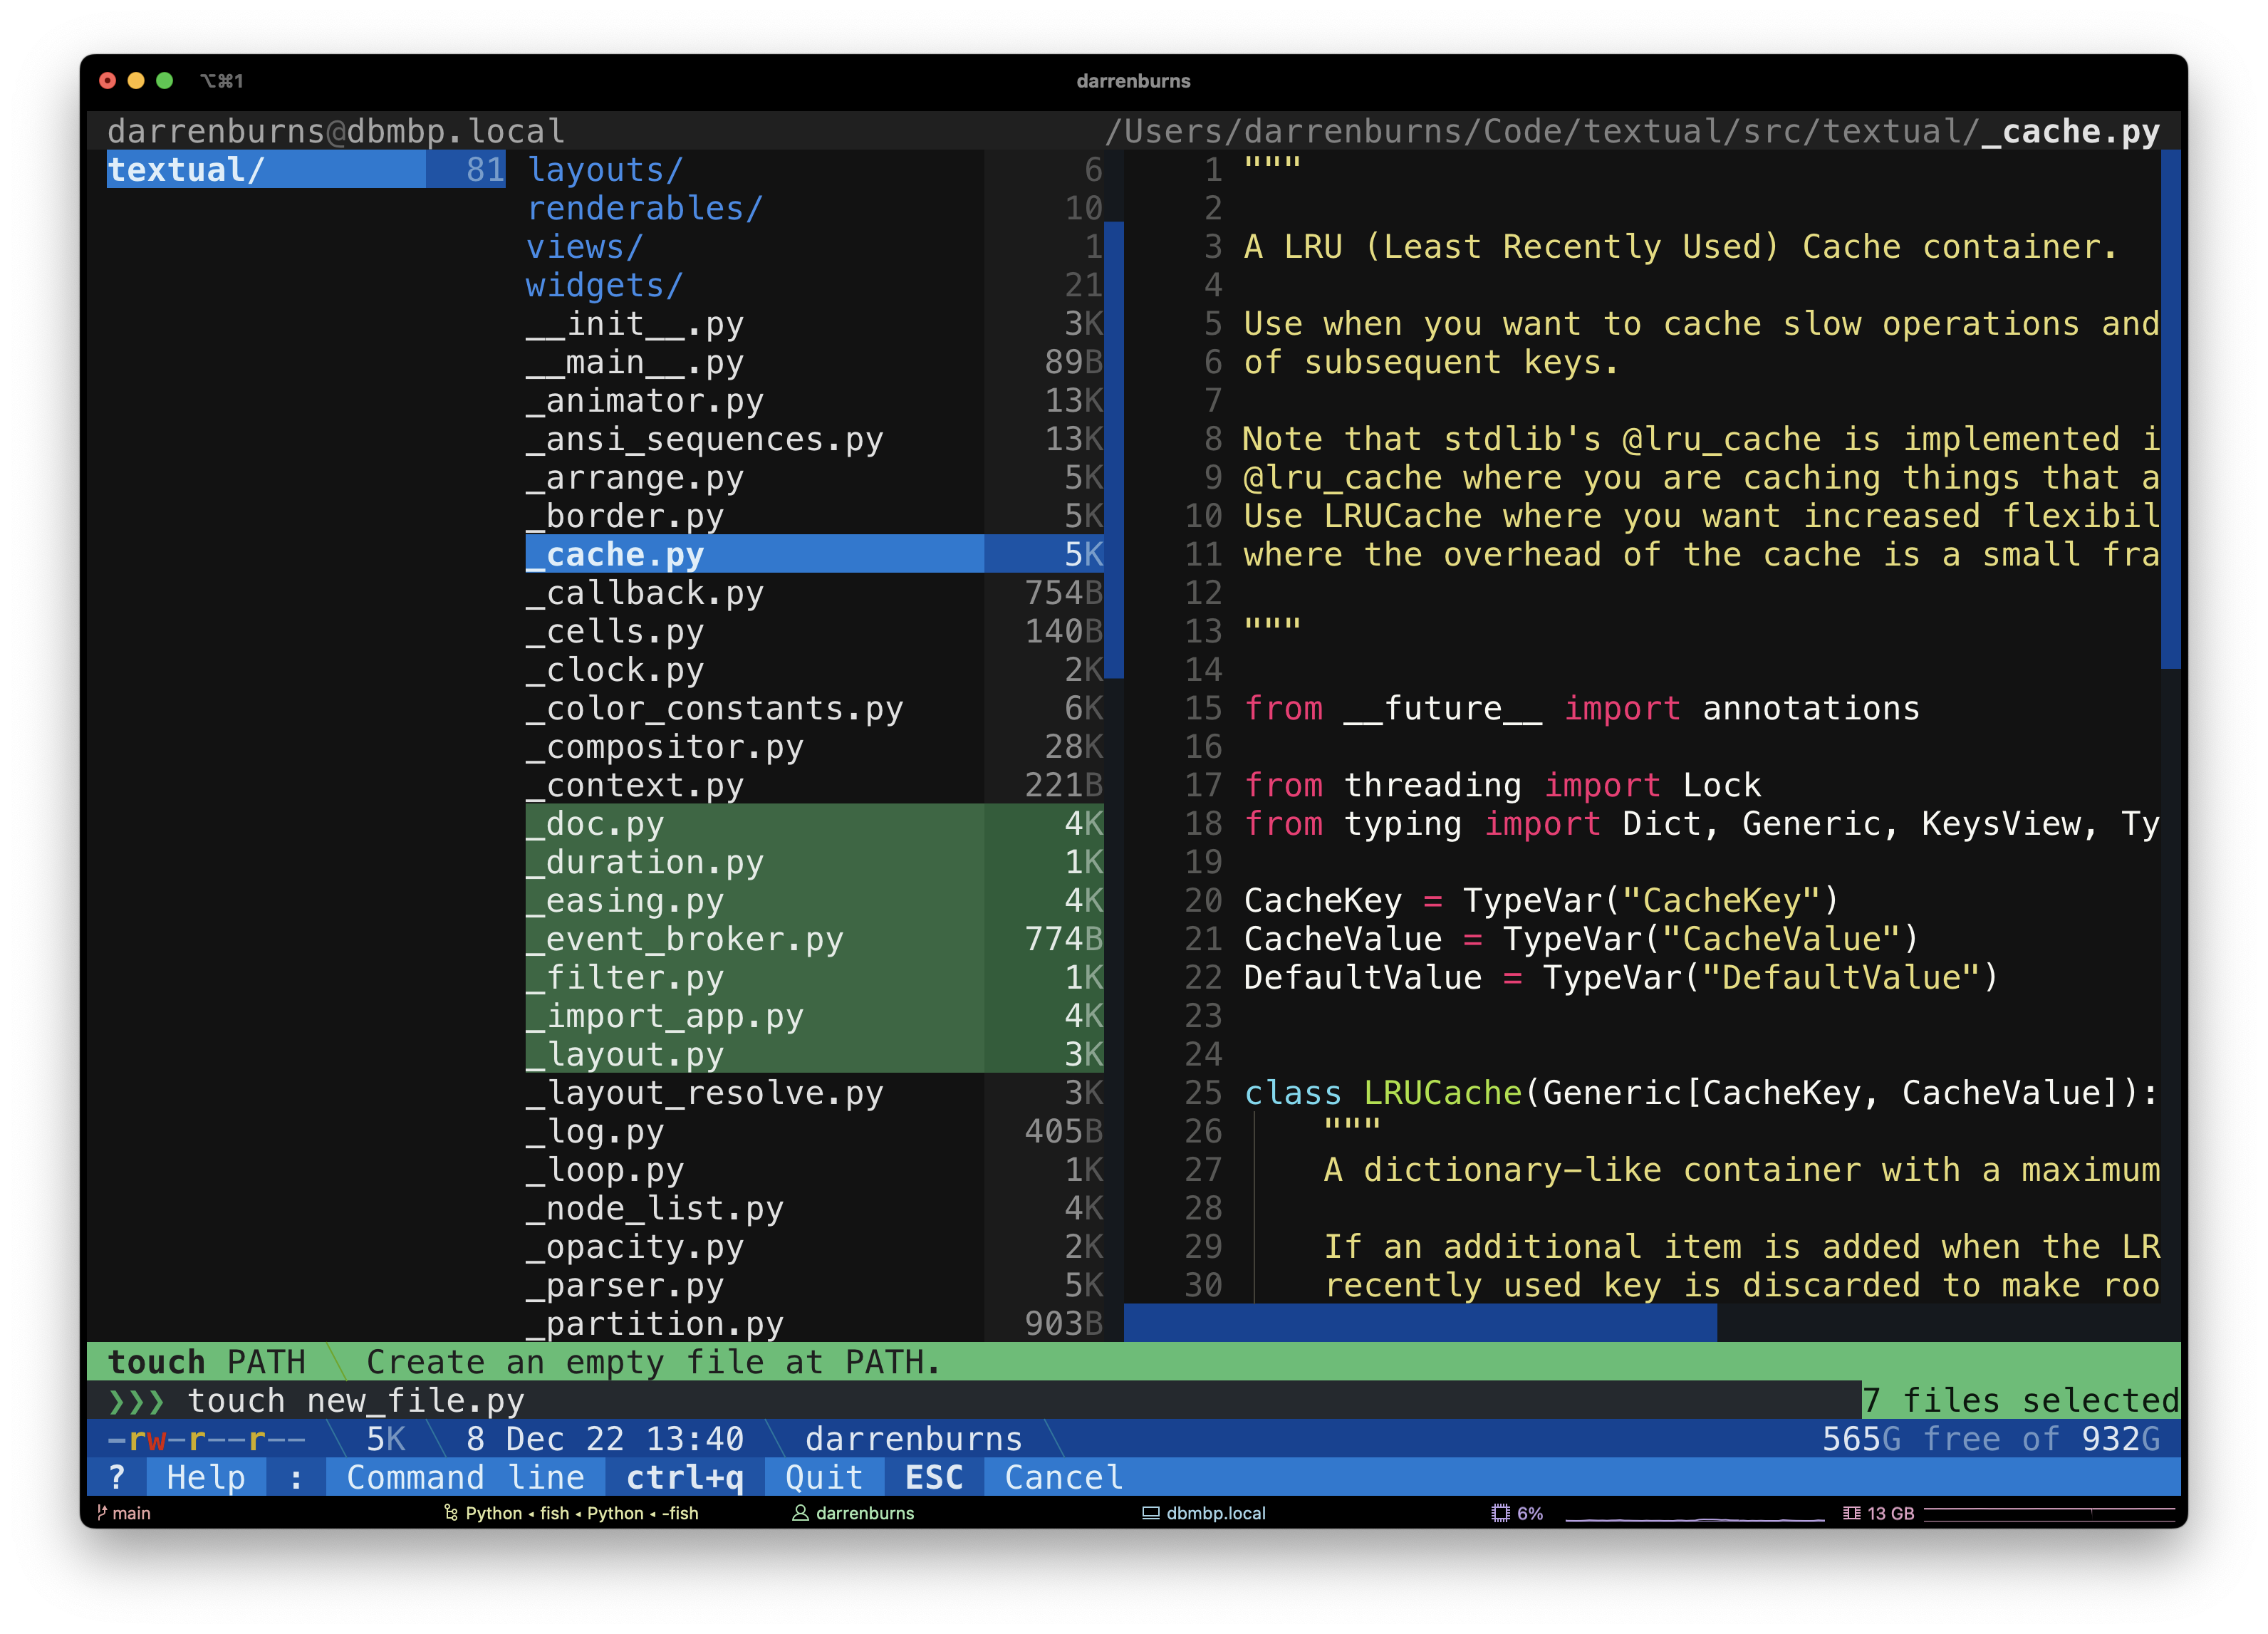
As of December 2022, it lets you browse your file system, filtering, multi-selection, creating and deleting files/directories, opening files in your $EDITOR and more.
I’m happy with how far this project has come — I think it’s a good example of the type of powerful application that can be built with Textual with relatively little code. I’ve been able to focus on features, instead of worrying about terminal emulator implementation details.
The project is available on GitHub.
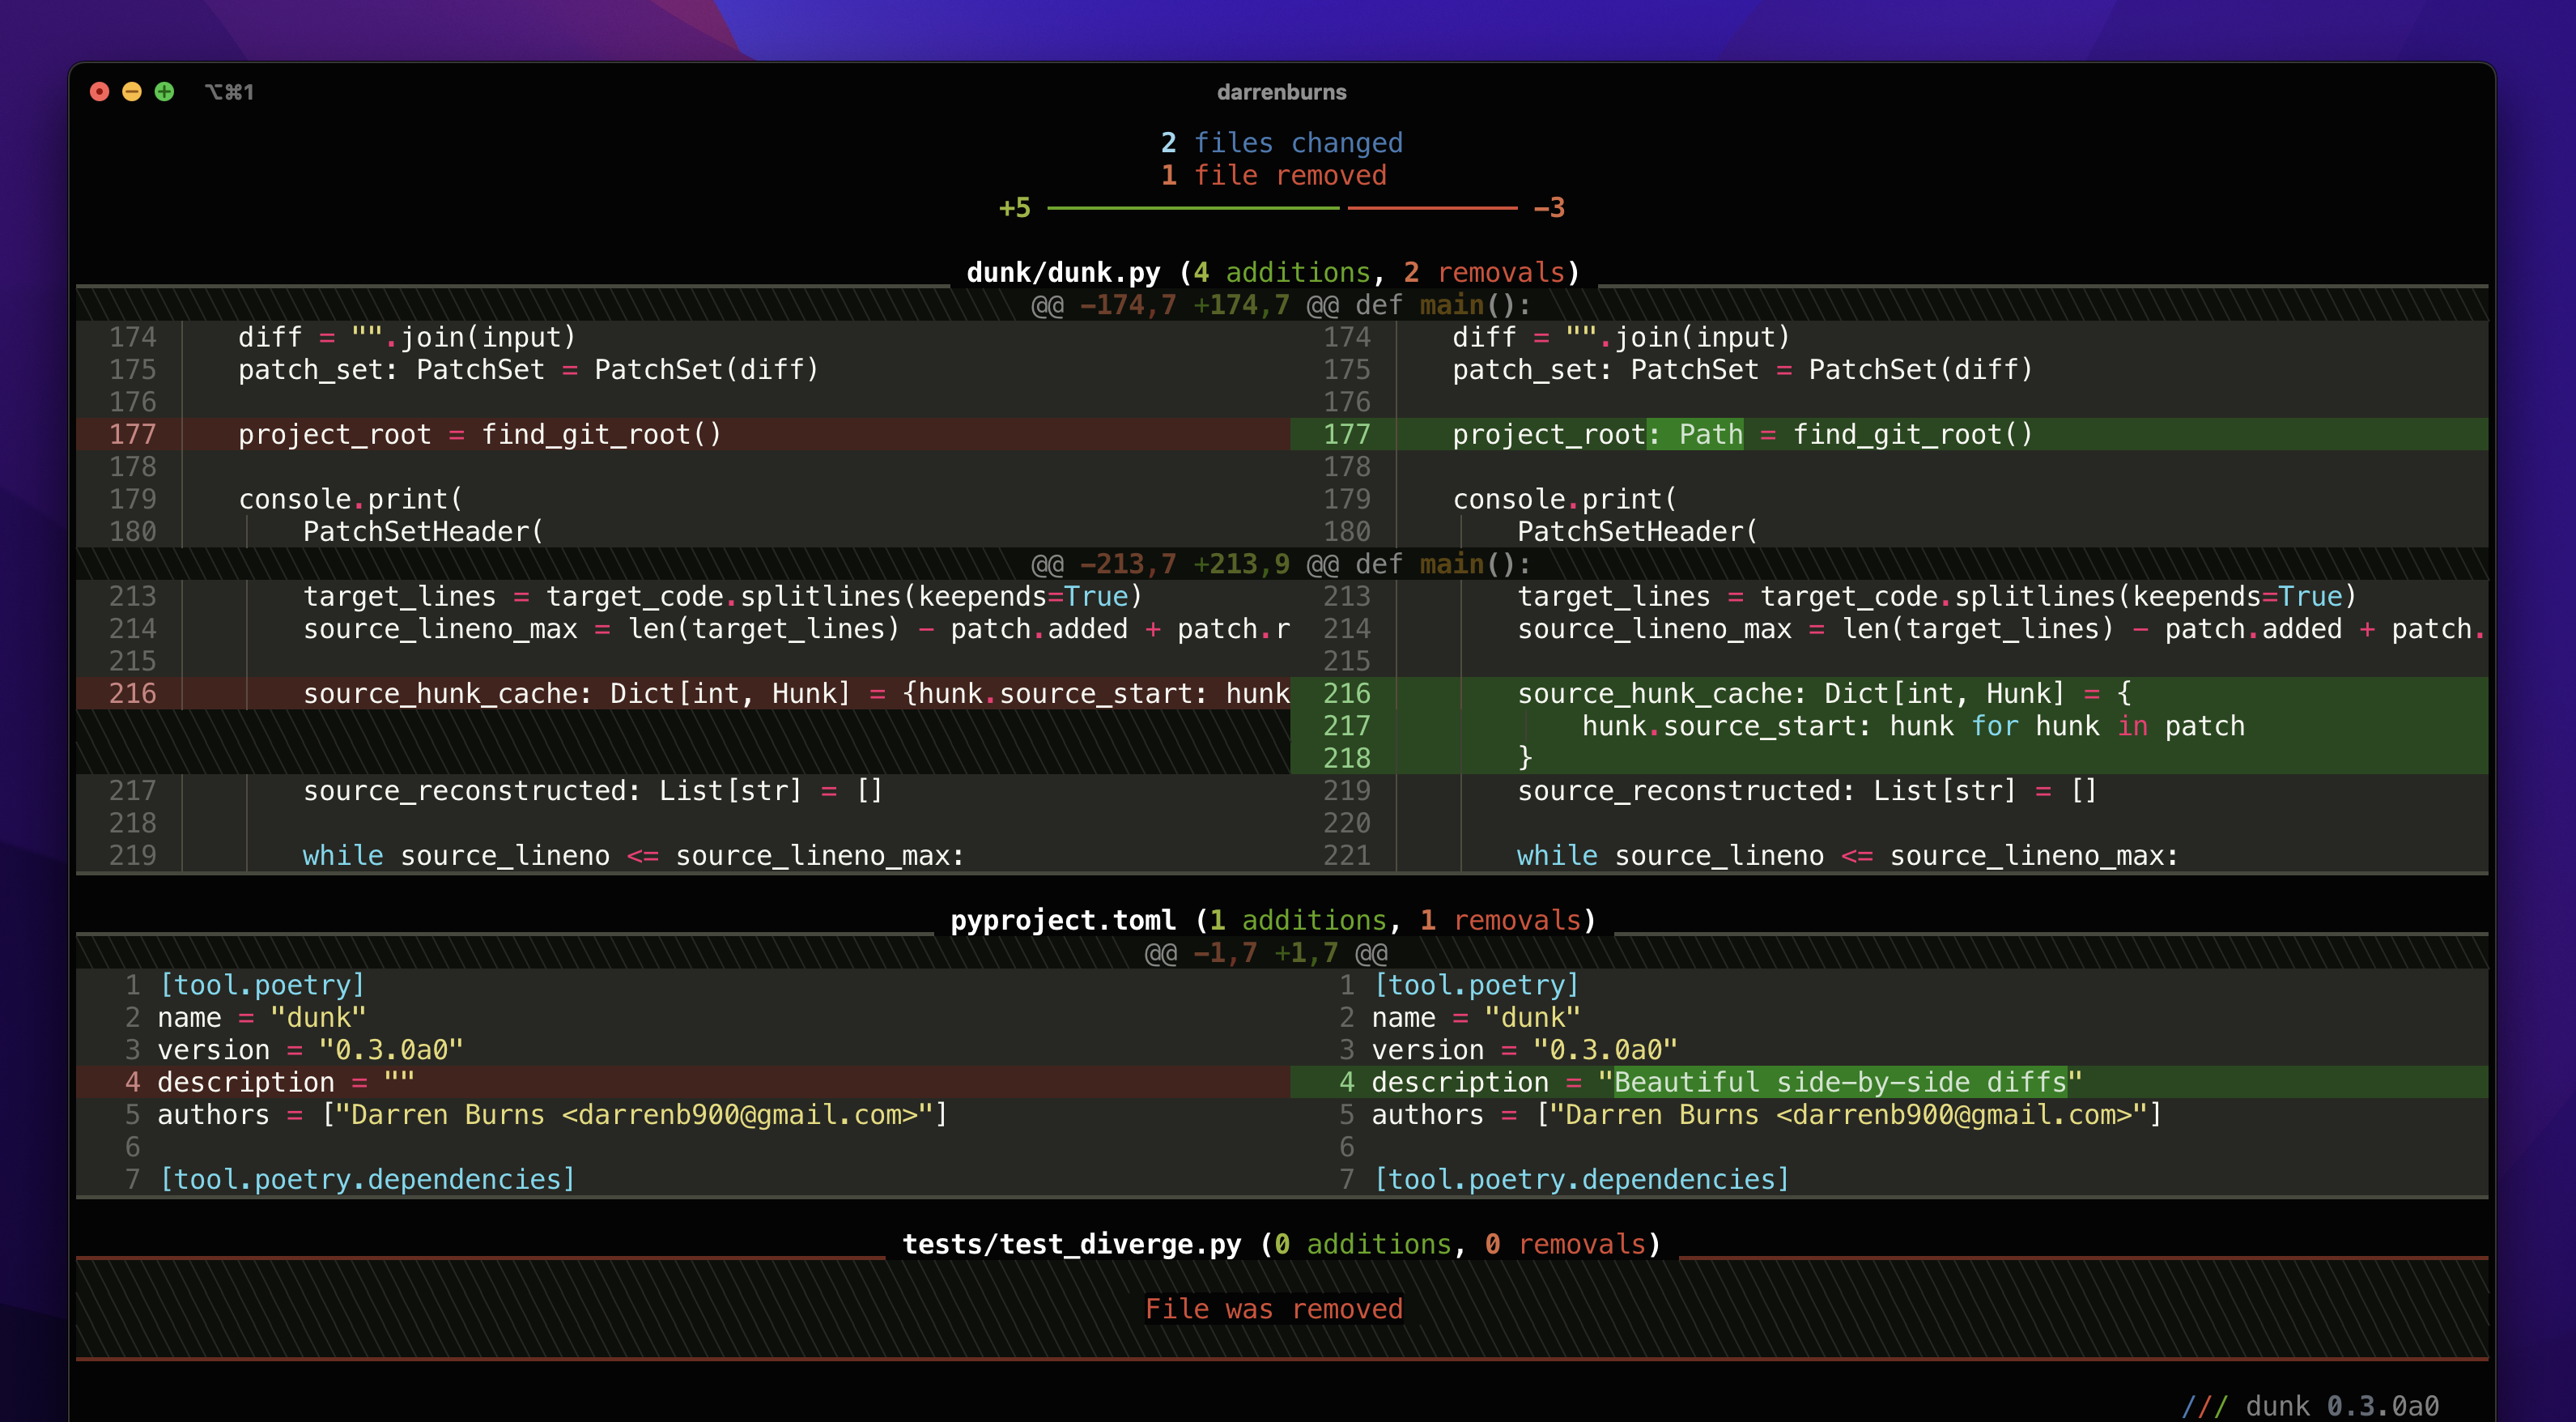
Better diffs in the terminal
Diffs in the terminal are often difficult to read at a glance. I wanted to see how close I could get to achieving a diff display of a quality similar to that found in the GitHub UI.
To attempt this, I built a tool called Dunk. It’s a command line program which you can pipe your git diff output into, and it’ll convert it into something which I find much more readable.
Although I’m not particularly proud of the code - there are a lot of “hacks” going on, but I’m proud of the result. If anything, it shows what can be achieved for tools like this.
For many diffs, the difference between running git diff and git diff | dunk | less -R is night and day.
It’d be interesting to revisit this at some point. It has its issues, but I’d love to see how it can be used alongside Textual to build a terminal-based diff/merge tool. Perhaps it could be combined with…
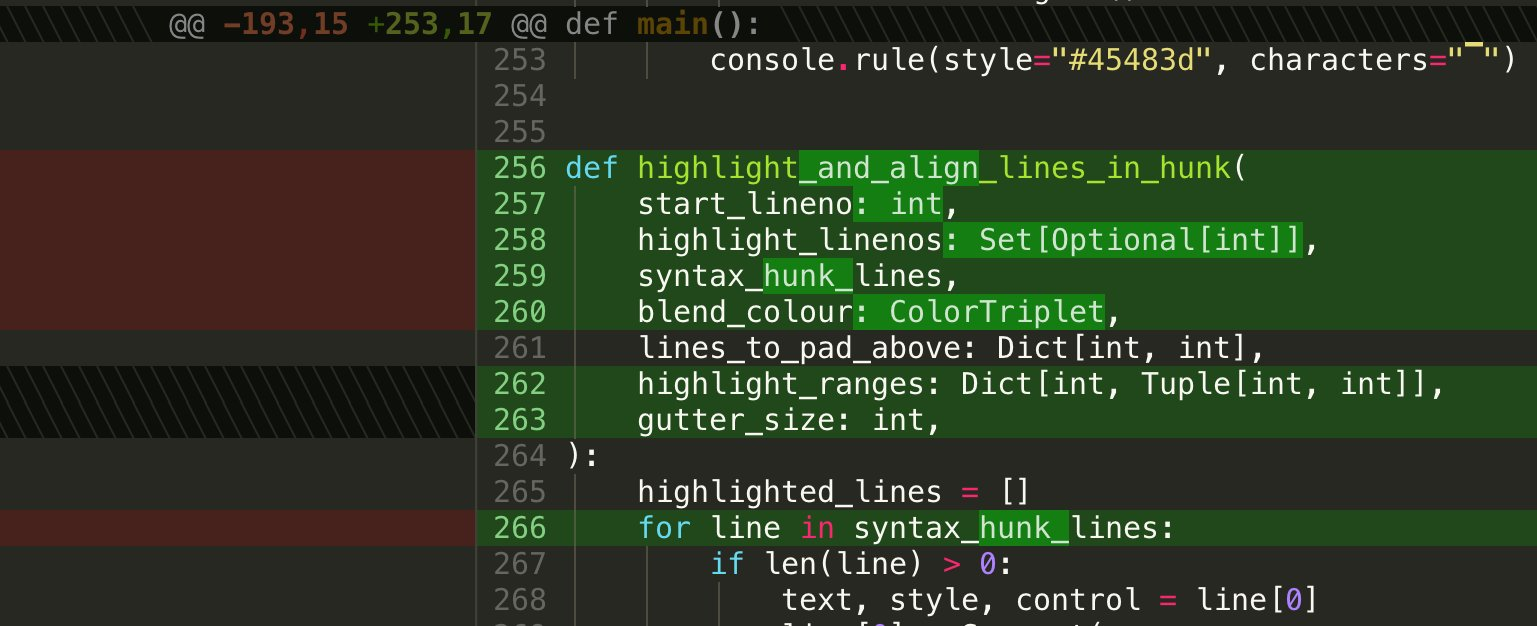
Code editor floating gutter
This is a common feature in text editors and IDEs: when you scroll to the right, you should still be able to see what line you’re on. Out of interest, I tried to recreate the effect in the terminal using Textual.

Textual CSS offers a dock property which allows you to attach a widget to an edge of its parent.
By creating a widget that contains a vertical list of numbers and setting the dock property to left, we can create a floating gutter effect.
Then, we just need to keep the scroll_y in sync between the gutter and the content to ensure the line numbers stay aligned.
Dropdown autocompletion menu
While working on Shira (a proof-of-concept, terminal-based Python object explorer), I wrote some autocompleting dropdown functionality.
Textual forgoes the z-index concept from browser CSS and instead uses a “named layer” system. Using the layers property you can defined an ordered list of named layers, and using the layer property, you can assign a descendant widget to one of those layers.
By creating a new layer above all others and assigning a widget to that layer, we can ensure that widget is painted above everything else.
In order to determine where to place the dropdown, we can track the current value in the dropdown by watching the reactive input “value” inside the Input widget. This method will be called every time the value of the Input changes, and we can use this hook to amend the position of our dropdown position to accommodate for the length of the input value.
I’ve now extracted this into a separate library called textual-autocomplete.
Tabs with animated underline
The aim here was to create a tab widget with underlines that animates smoothly as another tab is selected.
The difficulty with implementing something like this is that we don’t have pixel-perfect resolution when animating - a terminal window is just a big grid of fixed-width character cells.
 However, when animating things in a terminal, we can often achieve better granularity using Unicode related tricks. In this case, instead of shifting the bar along one whole cell, we adjust the endings of the bar to be a character which takes up half of a cell.
The exact characters that form the bar are "╺", "━" and "╸". When the bar sits perfectly within cell boundaries, every character is “━”. As it travels over a cell boundary, the left and right ends of the bar are updated to "╺" and "╸" respectively.
Snapshot testing for terminal apps
One of the great features we added to Rich this year was the ability to export console contents to an SVG. This feature was later exposed to Textual, allowing users to capture screenshots of their running Textual apps. Ultimately, I ended up creating a tool for snapshot testing in the Textual codebase.
Snapshot testing is used to ensure that Textual output doesn’t unexpectedly change. On disk, we store what we expect the output to look like. Then, when we run our unit tests, we get immediately alerted if the output has changed.
This essentially automates the process of manually spinning up several apps and inspecting them for unexpected visual changes. It’s great for catching subtle regressions!
In Textual, each CSS property has its own canonical example and an associated snapshot test. If we accidentally break a property in a way that affects the visual output, the chances of it sneaking into a release are greatly reduced, because the corresponding snapshot test will fail.
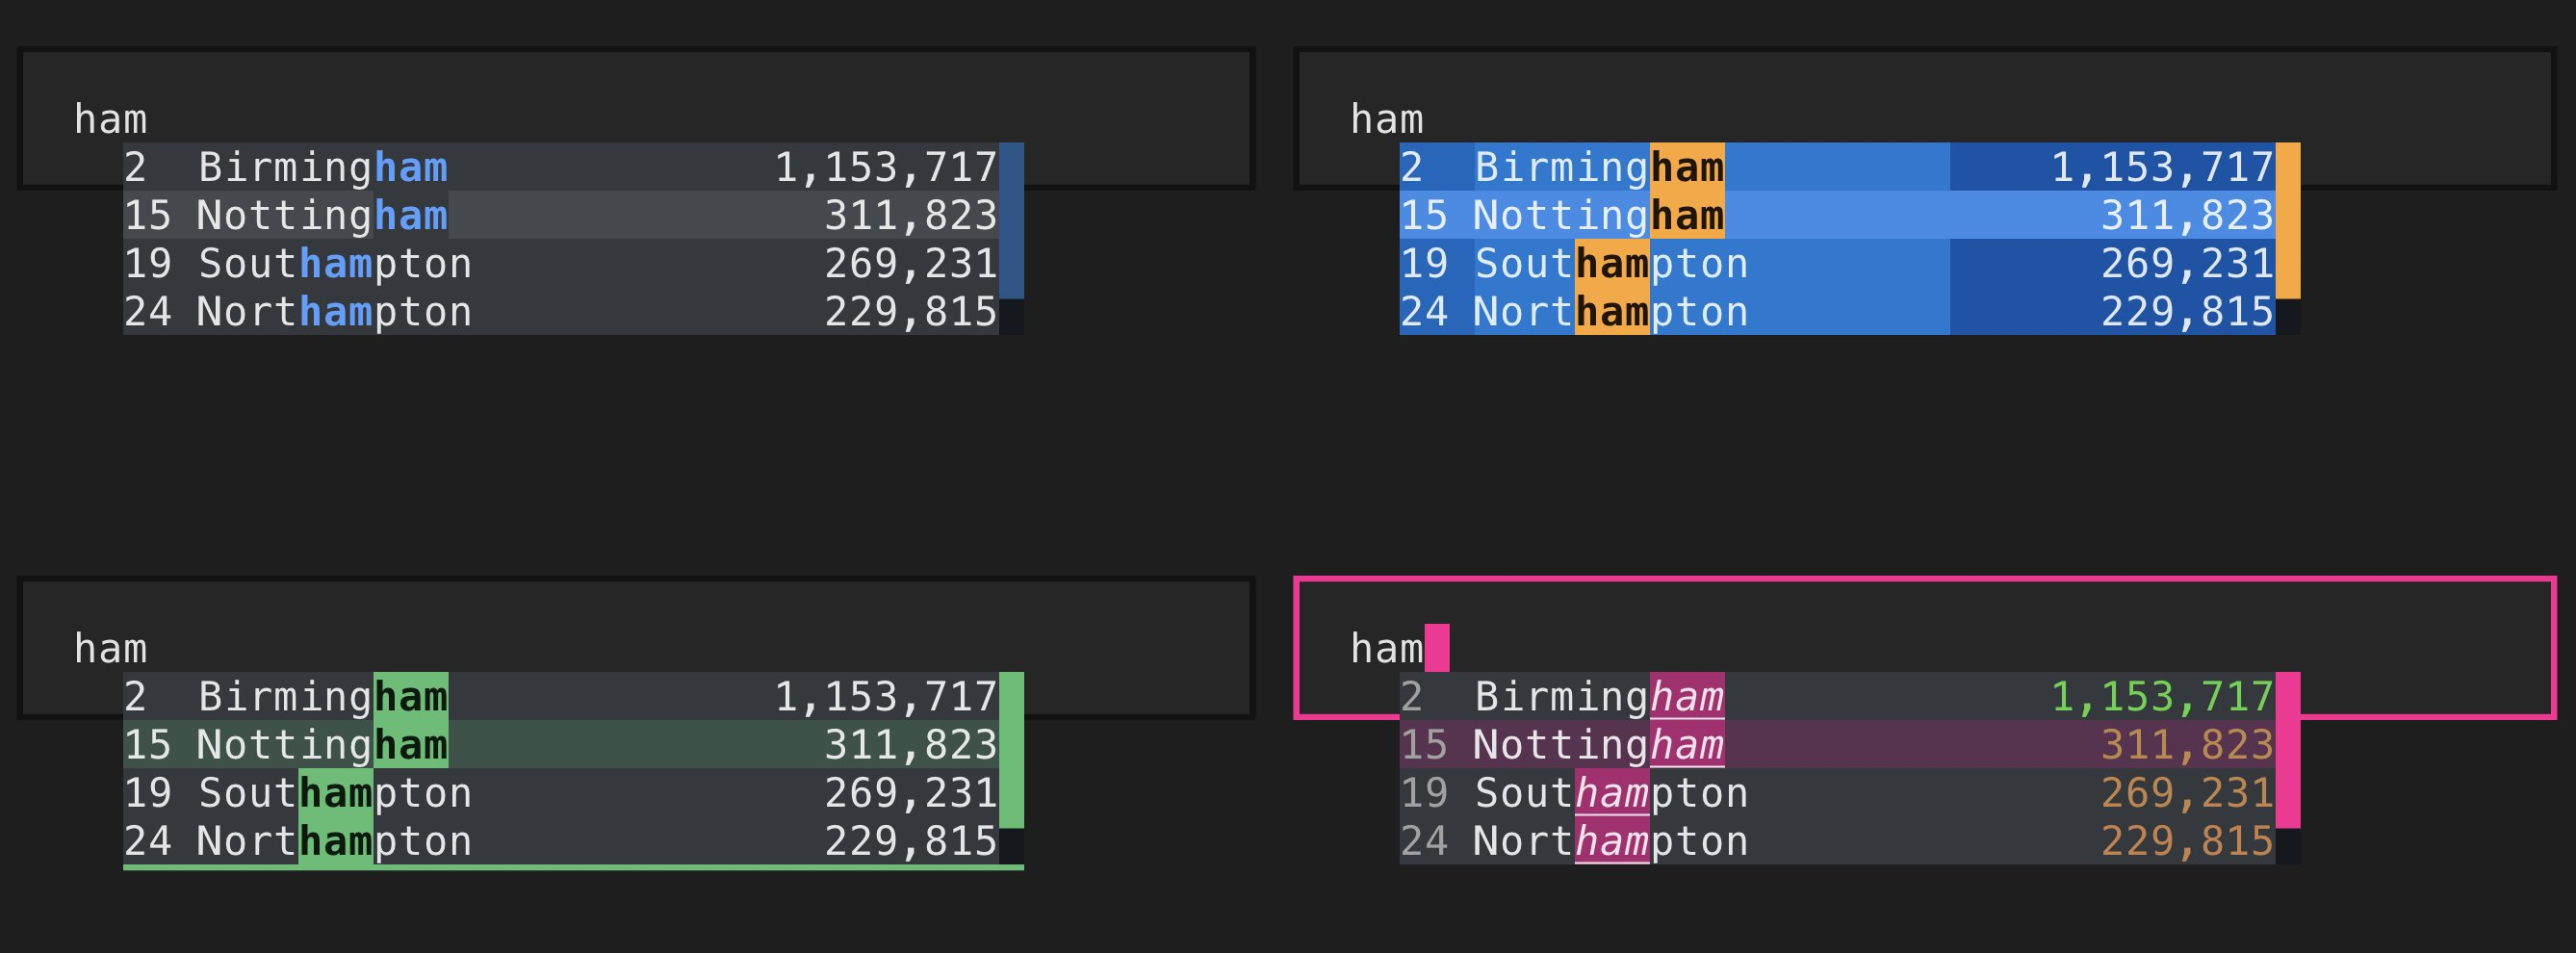
As part of this work, I built a web interface for comparing snapshots with test output. There’s even a little toggle which highlights the differences, since they’re sometimes rather subtle.
Since the terminal output shown in the video above is just an SVG image, I was able to add the "Show difference" functionality
by overlaying the two images and applying a single CSS property: mix-blend-mode: difference;.
The snapshot testing functionality itself is implemented as a pytest plugin, and it builds on top of a snapshot testing framework called syrupy.
It's quite likely that this will eventually be exposed to end-users of Textual.
Demonstrating animation
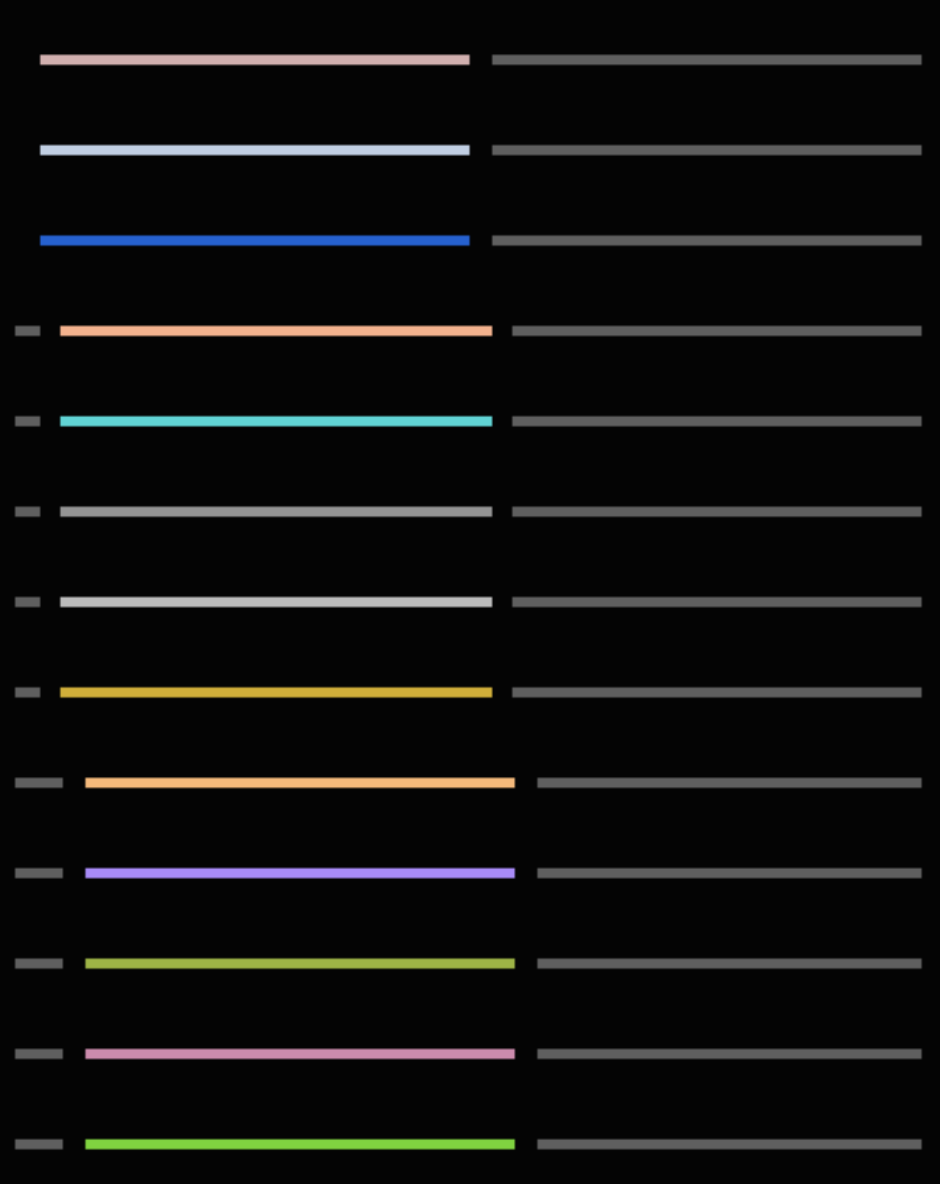
I built an example app to demonstrate how to animate in Textual and the available easing functions.
The smoothness here is achieved using tricks similar to those used in the tabs I discussed earlier. In fact, the bar that animates in the video above is the same Rich renderable that is used by Textual's scrollbars.
You can play with this app by running textual easing. Please use animation sparingly.
Developer console
When developing terminal based applications, performing simple debugging using print can be difficult, since the terminal is in application mode.
A project I worked on earlier in the year to improve the situation was the Textual developer console, which you can launch with textual console.
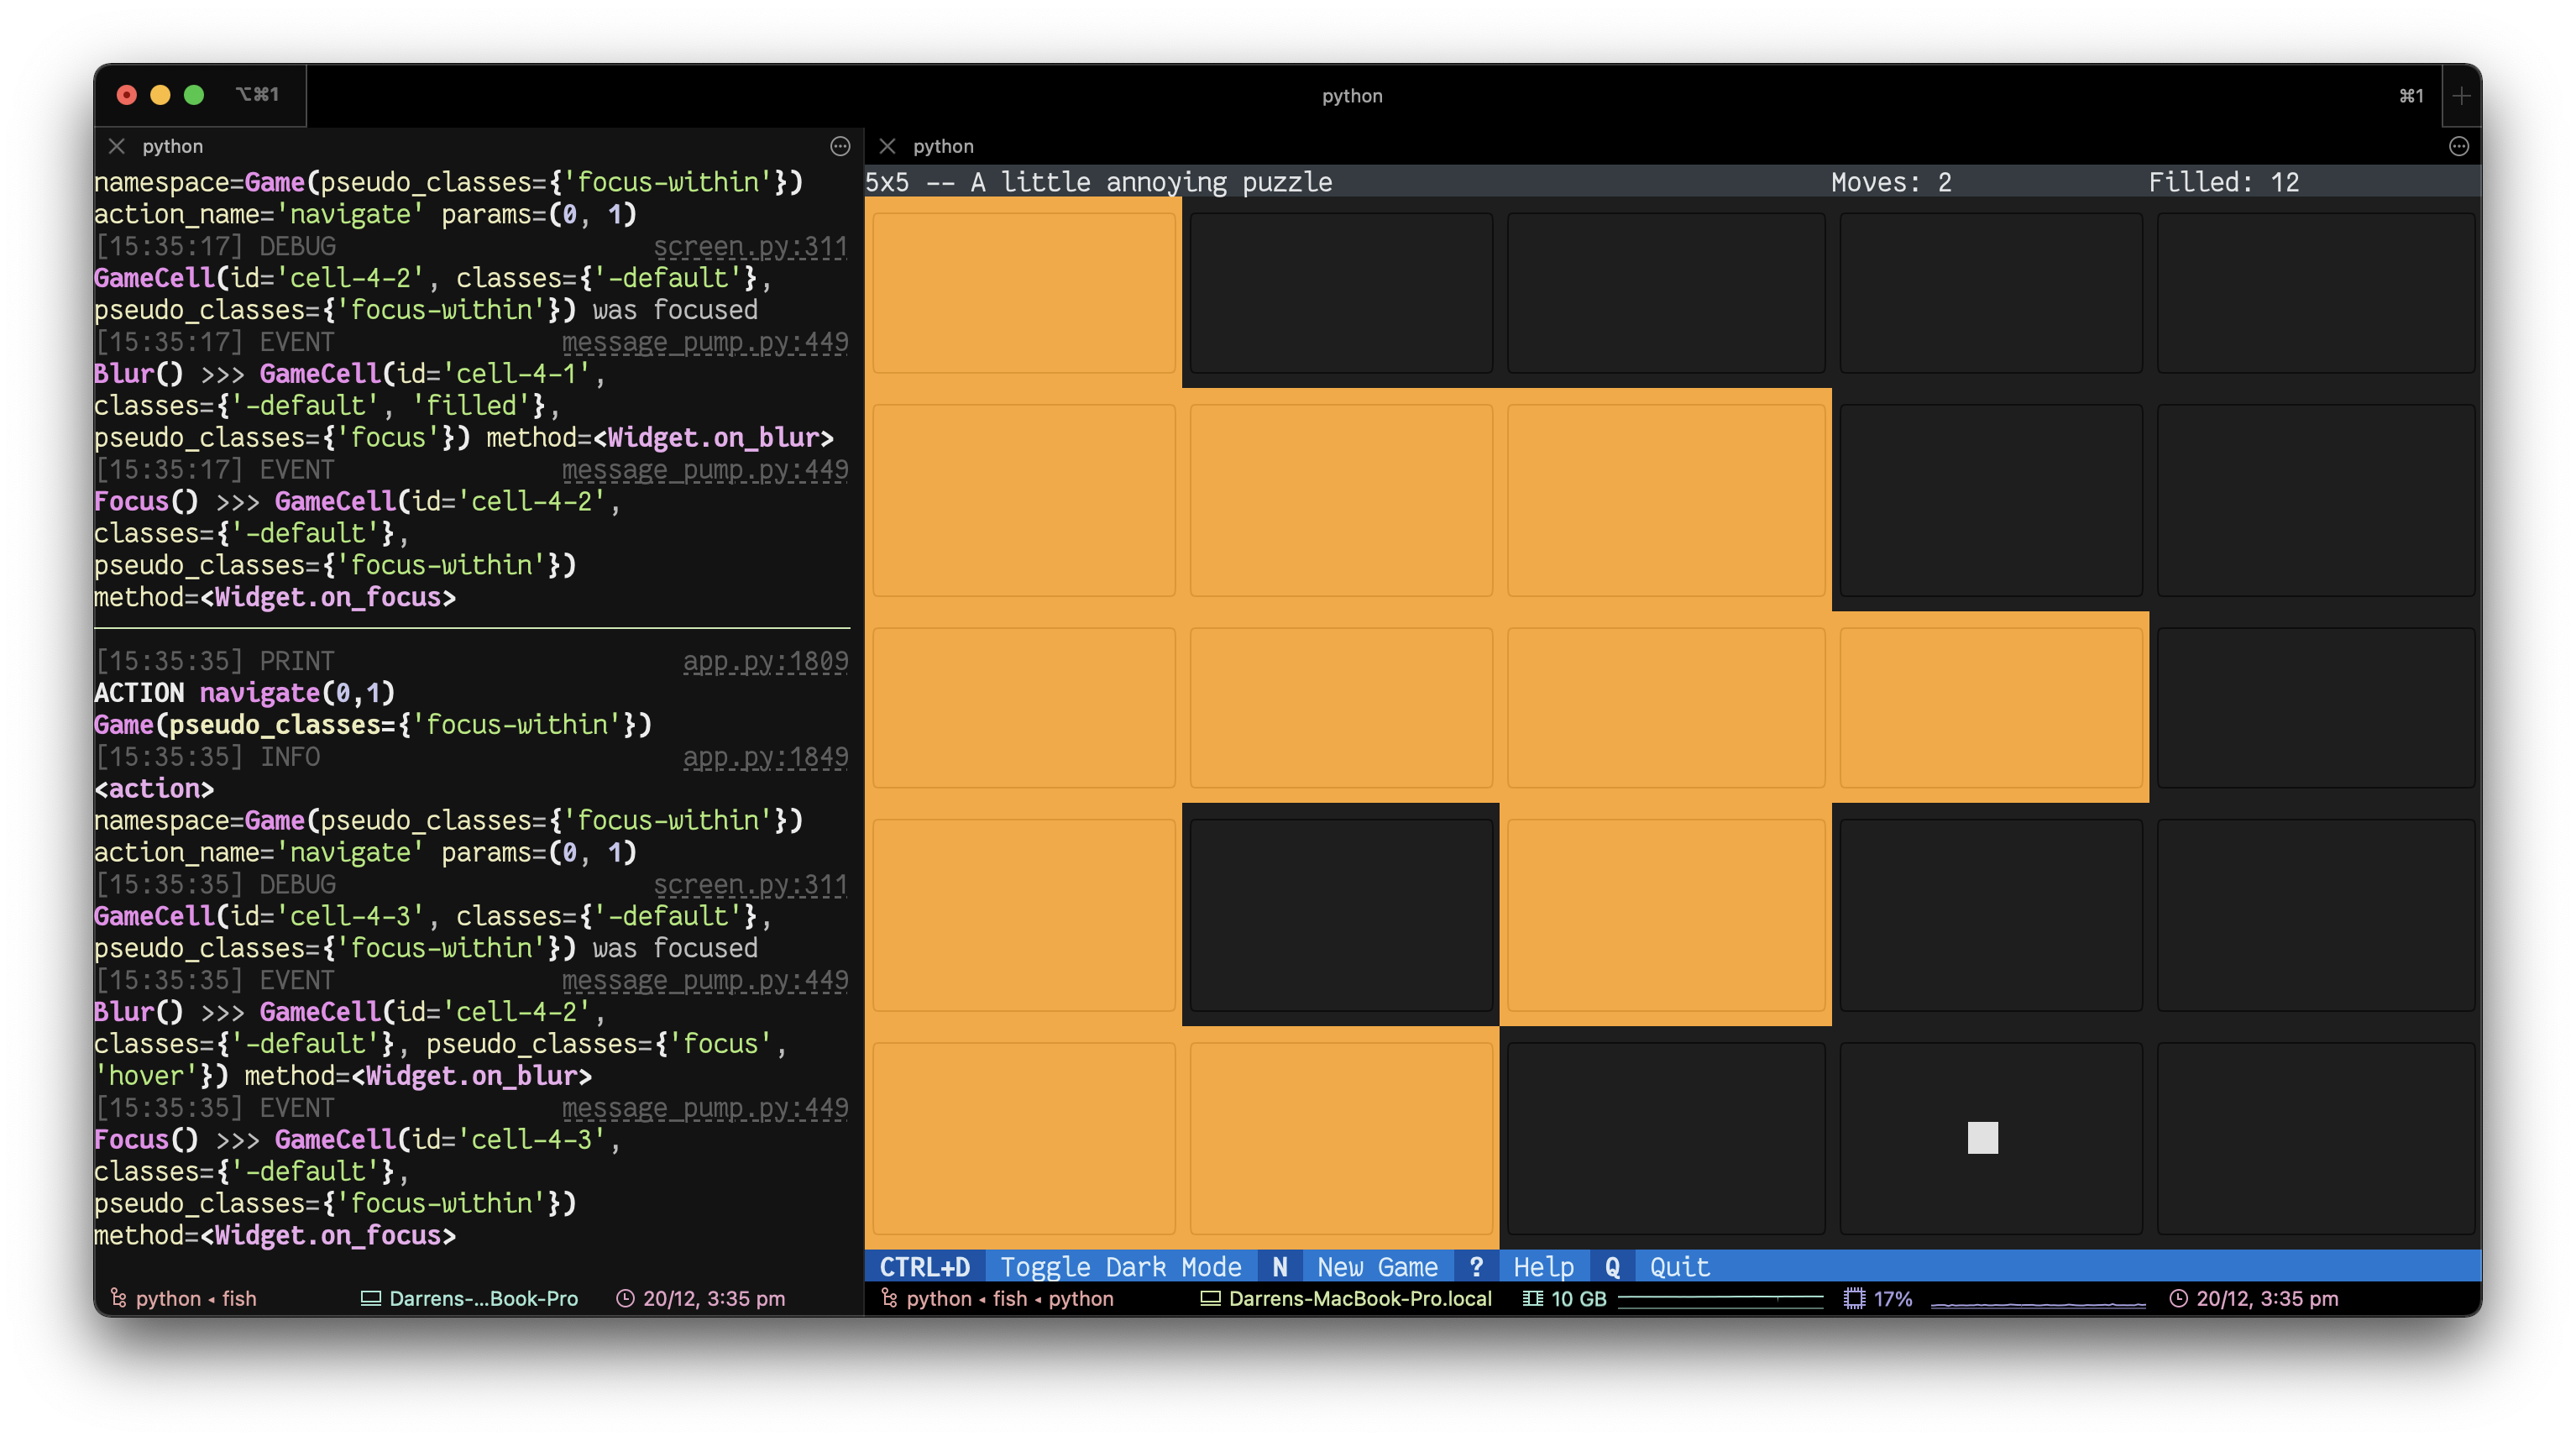
Then, by running a Textual application with the --dev flag, all standard output will be redirected to it.
This means you can use the builtin print function and still immediately see the output.
Textual itself also writes information to this console, giving insight into the messages that are flowing through an application.
Pixel art
Cells in the terminal are roughly two times taller than they are wide. This means, that two horizontally adjacent cells form an approximate square.
Using this fact, I wrote a simple library based on Rich and PIL which can convert an image file into terminal output.
You can find the library, rich-pixels, on GitHub.
It’s particularly good for displaying simple pixel art images. The SVG image below is also a good example of the SVG export functionality I touched on earlier.
Since the library generates an object which is renderable using Rich, these can easily be embedded inside Textual applications.
Here's an example of that in a scrapped "Pokédex" app I threw together:
This is a rather naive approach to the problem... but I did it for fun!
Other methods for displaying images in the terminal include:
- A more advanced library like chafa, which uses a range of Unicode characters to achieve a more accurate representation of the image.
- One of the available terminal image protocols, such as Sixel, Kitty’s Terminal Graphics Protocol, and iTerm Inline Images Protocol.
That was a whirlwind tour of just some of the projects I tackled in 2022. If you found it interesting, be sure to follow me on Twitter. I don't post often, but when I do, it's usually about things similar to those I've discussed here.